Inserting Doors
Available in: Architectural
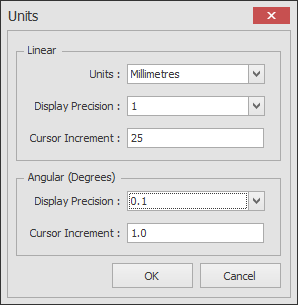
Currently the cursor increment is set to 100mm which was useful for drawing the walls. Before we insert a door we need to adjust this to 25mm which will help us insert the doors to the accuracy required. Select  Units command and set the Linear cursor increment to 25 as shown below.
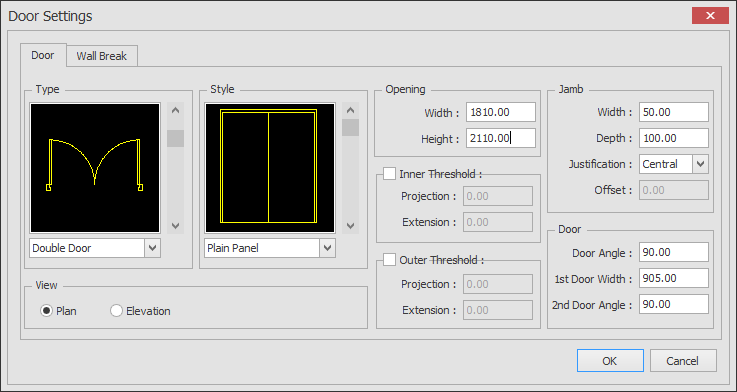
Select the  Doors button and the following dialog box is displayed.
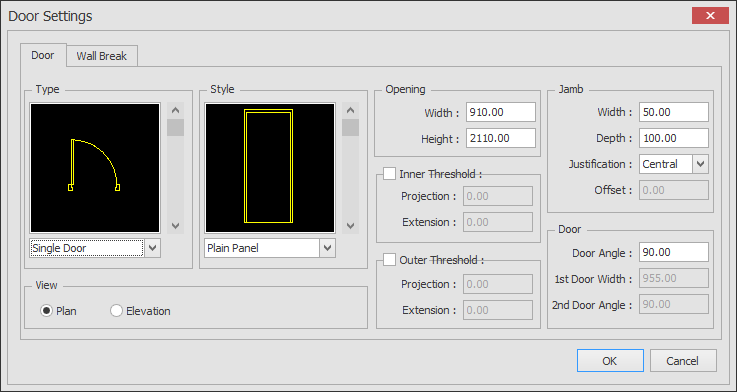
Match the settings shown here and click on OK .
You will notice that the Ribbon has changed to display a Command Specific Ribbon for inserting Doors. Set the Justification to 'Left'.
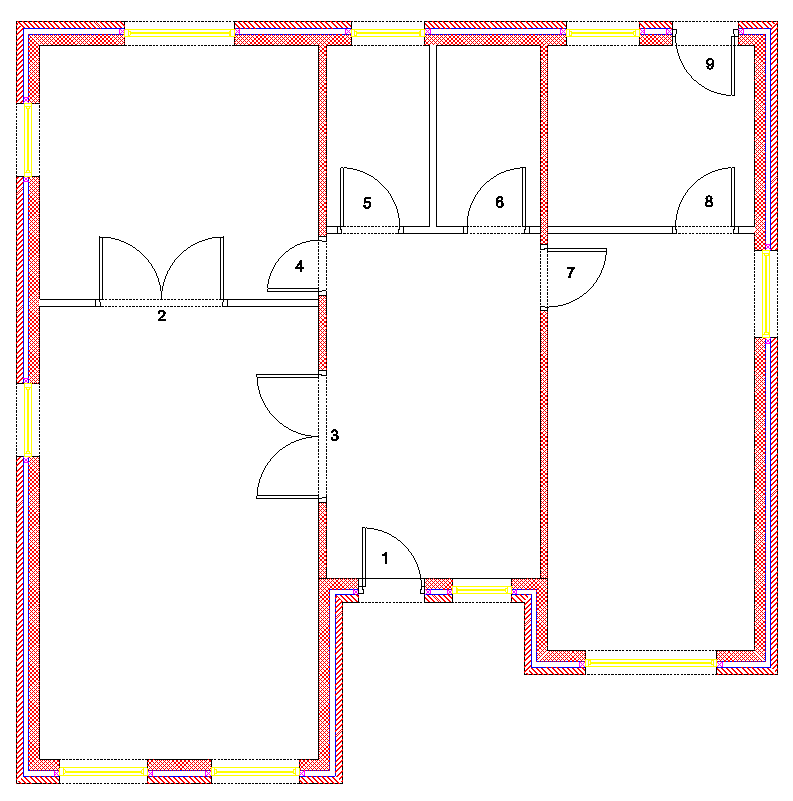
For the front door into the hallway move the cursor over the left hand end of the horizontal wall as shown below, use the dynamic dimensions to locate a position one brick length (225mm ) from P1. Move the cursor to position the swing also as shown here.
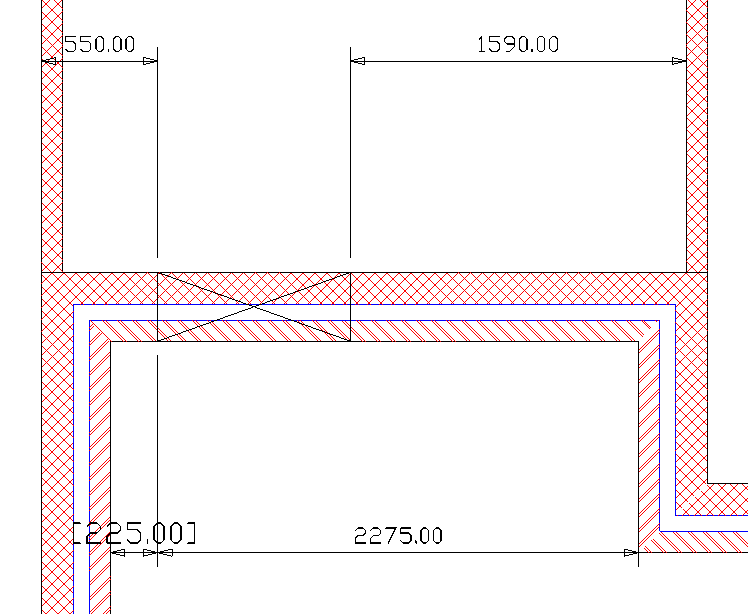
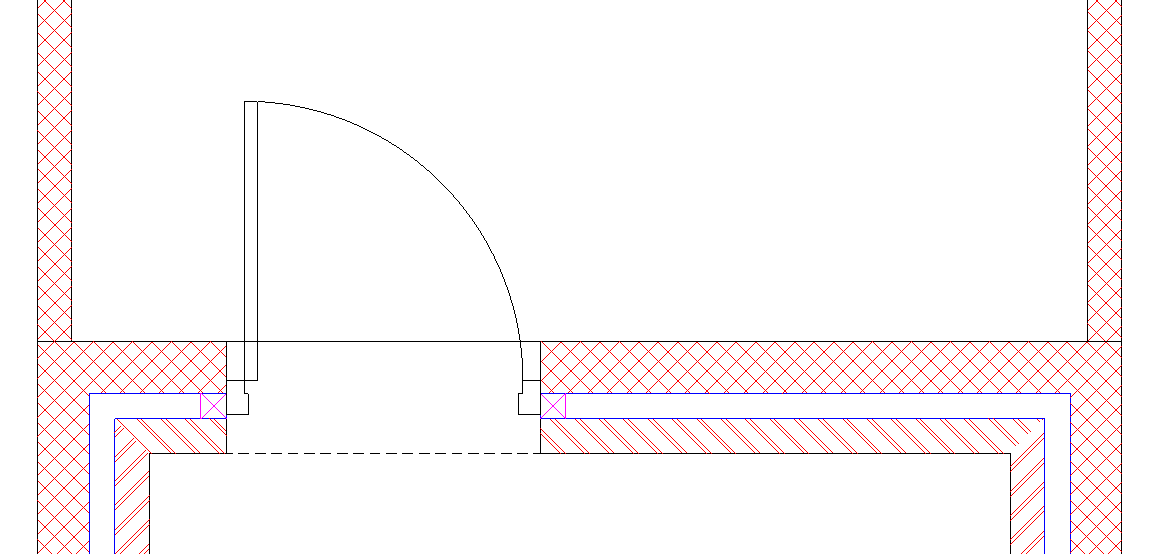
Move the cursor around and click to accept swing position shown below
Next, we will insert a double door between the Dining and Living Room.
Cancel the door insertion with 'right-mouse click' or . Then 'right-mouse click' to repeat the door command and return to the dialog box.
Select the Doors button again and change the settings to match those below.
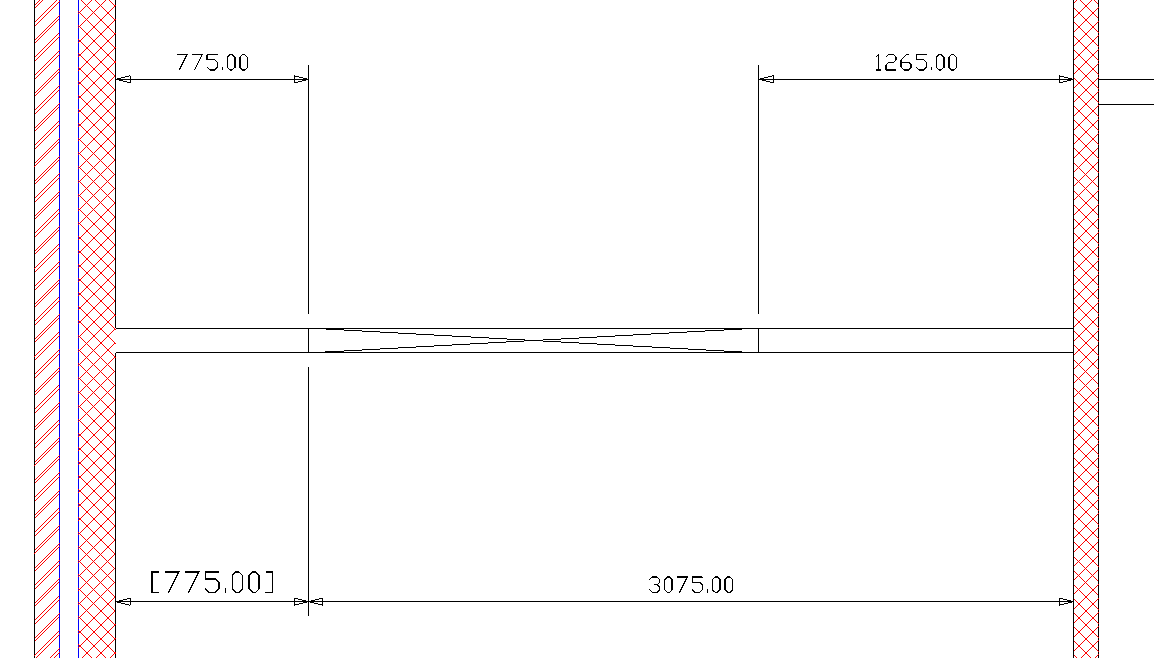
Select 'OK' and check that the justification is set to 'Left'. This time instead of using the dynamic dimensions to position the door we will type the dimension into the Distance Input box. However we must define which is the reference point for the dimension. The controlling dimension helps us do this. Move the mouse over the internal wall shown below and you will see the four dynamic dimensions. The text on one of these is shown in brackets, this is the controlling dimension. To change this use the  key to switch between the dimensions at each end and move the mouse across the wall to switch the side of this key dimension.
With the controlling dimension as either of the left hand side dimensions type '775' into the Distance Input box to position the door as shown below.
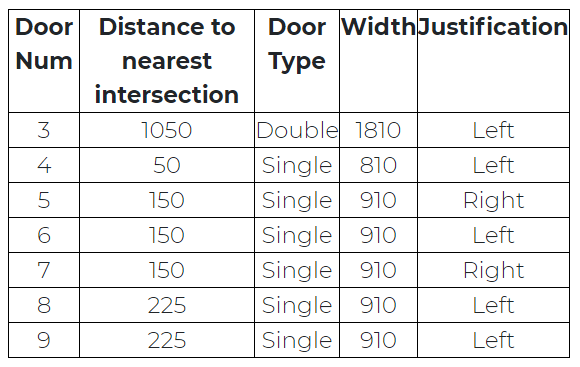
Use the table and picture below as your reference for the settings of the remaining seven doors shown below. Note that door number 4 is only 810 wide.