Draft it Help System
The complete Help system for Draft it is available on these pages.
Available in: FREE, Plus, PRO & Architectural
Lets add the first door. Use Zoom Window
 to close in on the right hand door shown here.

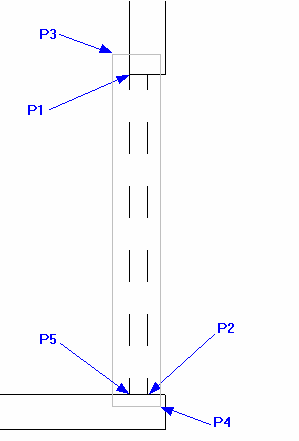
The rectangle we will draw first is shown dotted.
Select the Rectangle button
 and click on the 'End' point at P1 as the 1st rectangle corner. Now using Direct Input type '50' and press
 (this is the X value), now type ,'-910' and
 (this is the Y value).
The rectangle (our door) is drawn.
Now we will rotate this door. The Rotate command cannot be selected until we have highlighted the entities to rotate. Click and hold the mouse button down at P3 then drag down and right to P4 (a solid line box is drawn as you move the cursor) and release the mouse button. This will have selected all items completely inside the box (the entity handles are displayed) i.e the door we are about to rotate.
Select the Rotate button
 and the prompt reads:
Give Point To Rotate About:
Select the 'End' point at P5 and the prompt reads:
Give Reference Point To Rotate:
Select the 'End' point at P1 and the prompt reads:
Give Point To Rotate To:
The polar input mode is automatically switched on so drag the cursor to the left until the dimension reads 45° then click to accept.
The entity handles are still displayed so click in free space to release them.
Now use the Arc command
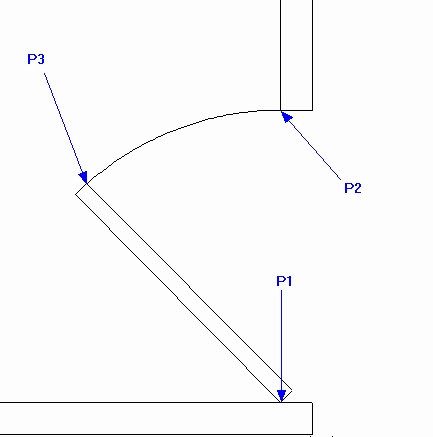
 to draw the arc shown below. Click the centre point (P1). Make sure the Snap input option
(
 )
is set, the Start point is P2 and the End Point is P3.

