Draft it Help System
The complete Help system for Draft it is available on these pages.
Available in: Pro and Architectural
You can add hatch patterns to Polylines
and/or Circles
(boundaries). Select the boundaries to hatch and then click the
 button.
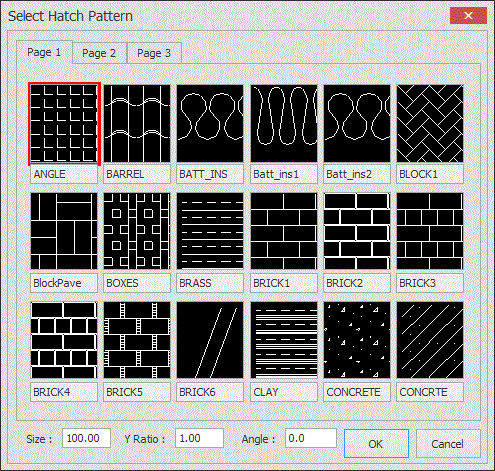
The following dialog box is displayed.

The available patterns are displayed across a number of pages.
At the bottom of the dialog box are three insertion modifiers.
Size - This is the default size of the repeatable pattern, for example you could enter 225 (mm) if using a brick pattern.
Y Ratio - This allows the pattern to be distorted in both the horizontal and vertical axis.
Angle - This is a rotational angle applied to the pattern.
To select a pattern simple click on the thumbnail picture, set the insertion modifiers as required and click OK.
The prompt reads:
Give Hatch Origin Point:
Indicate an origin point for the hatch pattern using any of the snaps and input options and the hatch pattern is added to the drawing.
If multiple boundaries are selected they will be hatched separately. Any boundaries completely contained within another boundary will not be hatch, effectively being 'holes' or 'islands' within the outer boundary. For any boundaries which partially overlap then the intersecting part of the boundaries will not be hatched. The following diagram picture demonstrates this, showing the resulting hatch when both shapes are selected together.

The hatch pattern is not linked to the Polyline(s). For information on modifying a hatching see Modifying/Moving Hatching.
