Tutorial 2 Part 11
Available in: Free, Plus, Pro, Architectural
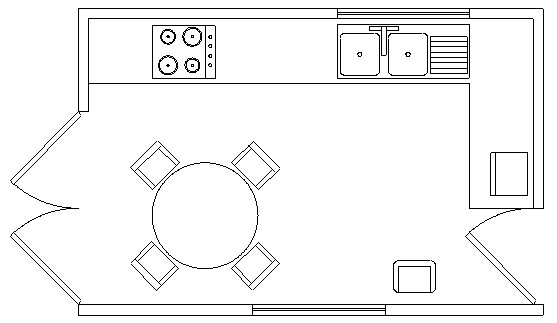
Finally we will add the table and chairs.
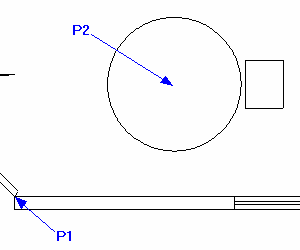
Select the Circle command  and go Relative to P1, move the cursor right and up until the dimensions read 1200 in 'X' and 850 in 'Y', then click to accept. Hit
  and set the radius by setting 500 in 'X' and 0 in 'Y', then click to accept.
Now to draw the chair outline. Select Rectangle  and go Relative to P2 at the 'Centre' point of the table. Move the cursor right and up and click when the dimensions read 520 in 'X' and 180 in 'Y'. Now move right and down and click when the dimensions read 290 in 'X' and -360 in 'Y' .
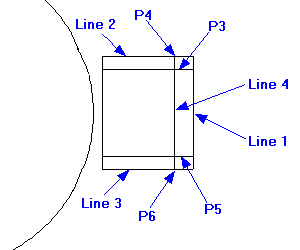
Zoom in around the rectangle as below.
Select the Offset button  and click on the 'Line 1', drag to the left and click into place when the dimension reads -60, (click the
  button if the value is locked). Repeat the Offset to create two more lines, one 40 above 'Line 2' and another 40 below 'Line 3'.
Select the Trim/Extend button  . Select the line parallel to 'Line 2' near to 'P3', make sure Snap is set (Hit
 ) and snap to the 'End' point, at 'P4'. Repeat Trim/Extend and select the line parallel to 'Line 3' near to 'P5', and snap to the 'End' point, at 'P6'.
Select the lines which form the chair so that the Entity handles are displayed as shown here. Select Rotate  and pick 'P1' (table 'Centre') as the rotation centre point. Now select the 'Quad' point at 'P2' as the reference point. Finally move the cursor anti-clockwise and click when the angle dimension reads 45° (alternatively type 45 in the angle input field and click anywhere to accept).
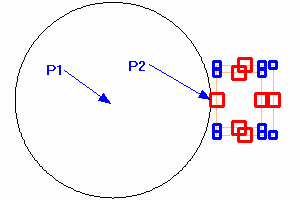
Now we will copy and arrange the chairs into their final position (shown as dotted here).
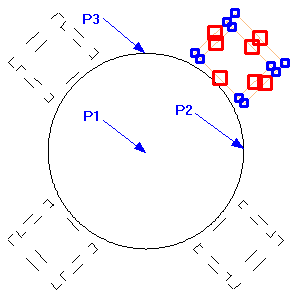
The chair entities should still be selected from the previous operation. Select Polar Array  and check that in the system toolbar 'No.' is set to 4 and that 'Rotate Copies' is ticked ON. Click on 'P1' (table 'Centre') as the rotation centre point. Now select the 'Quad' point at 'P2' as the reference point. Finally move the cursor anti-clockwise and click on the 'Quadrant' point 'P3' as the point to array to.
The tutorial is now complete. Select Zoom Extents  and your drawing should appear as below. You may want to practice further and add more detail to your kitchen layout.