
Modify the First Floor Walls
Available in: Architectural
Firstly lets delete two of the stud walls.
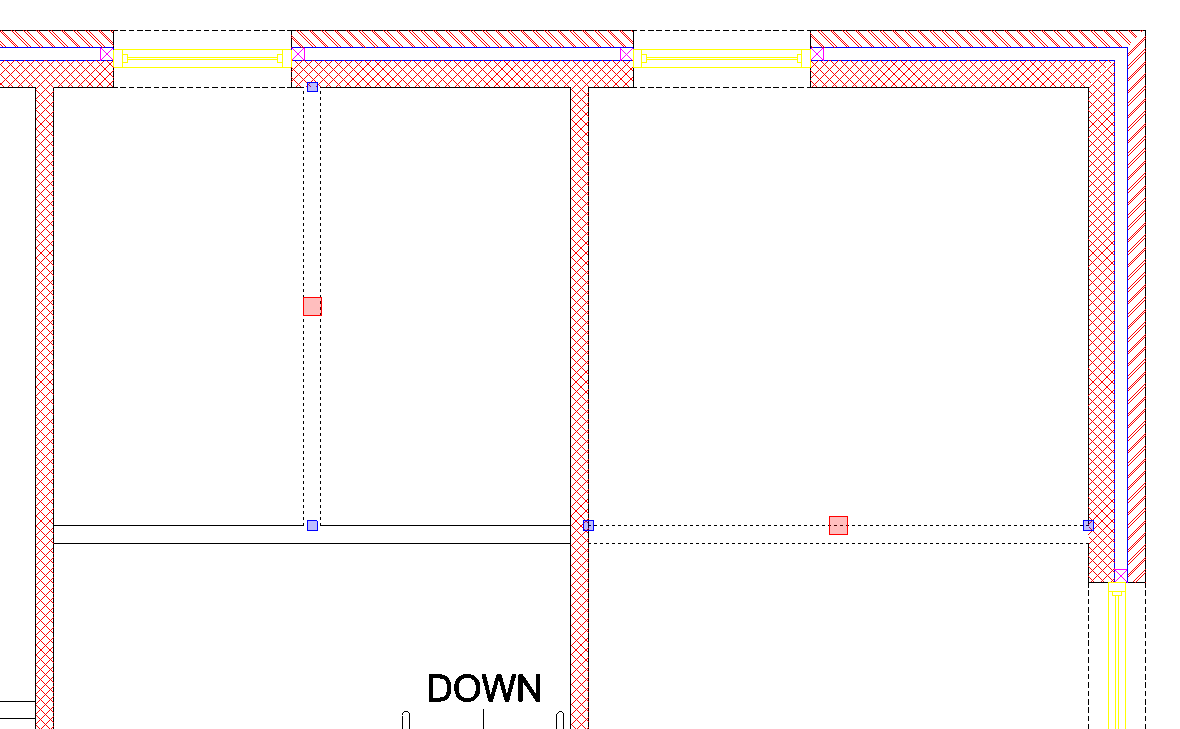
Hold down the  key and click on each of the stud walls highlighted in the picture below. Once they are selected press the
  key and they will be removed. If there appear to be gaps in the adjoining walls you may need to click on the
  Refresh button to update the display.
Now lets adds some new stud walls. Click on the  Walls button. Check that the wall type is set to 'Stud Wall' and click OK.
Check 'Left' Justified is set in the Ribbon. As you can see in the picture below the 1st wall point is 2300 down from the internal corner.
To select this point correctly we will use Relative. Move over the End point at 'P1' and when the 'End' snap symbol  is displayed hit the
 key.
key.
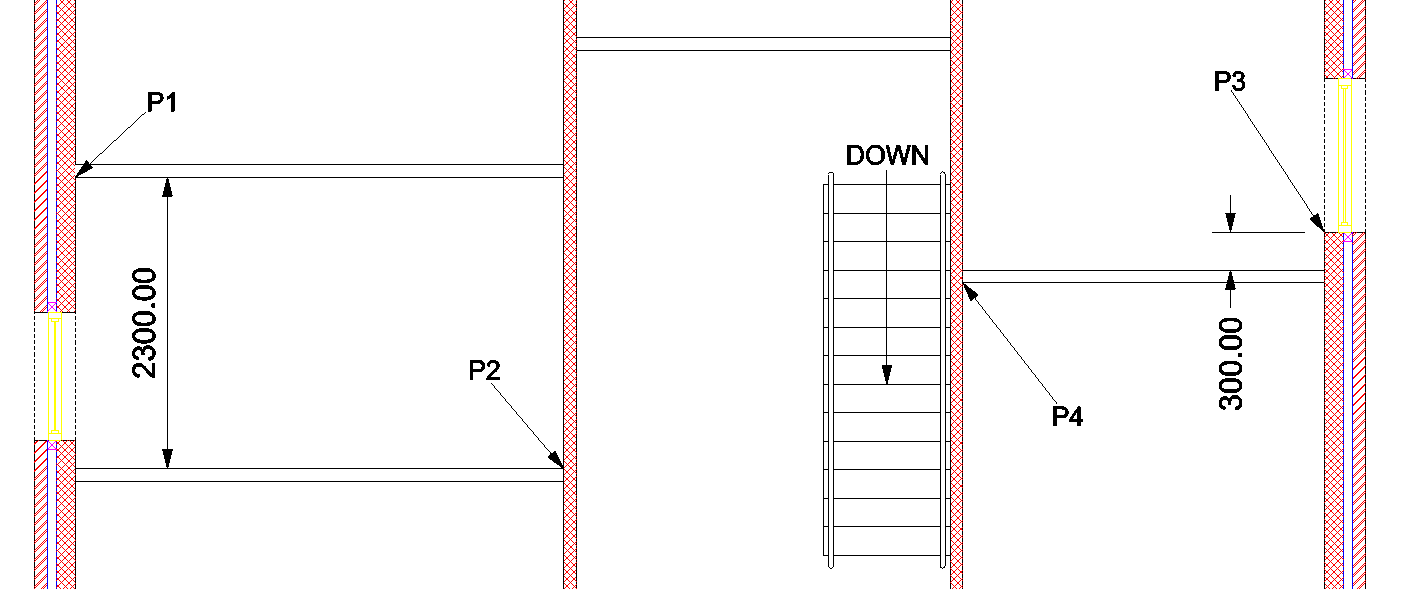
Now press the key, type in 2300 and press
 , press
 to select 'Snap mode and move across to 'P2' and snap to the Perpendicular point on the wall.
Press the key to stop drawing walls and then click the right mouse button (or press
  ) to 'Repeat Wall command. Click 'OK' to accept the dialog box settings. Move the cursor over the end point of the window 'P3' and when the 'End' snap symbol is displayed hit the
 key. Now press the
 key, type in 300 press
  , set the 'justification' to 'right', pressto select ' Snap mode and move across to 'P4' and snap to the Perpendicular point on the wall.