Draft it Help System
The complete Help system for Draft it is available on these pages.
Available in: FREE, Plus, PRO & Architectural
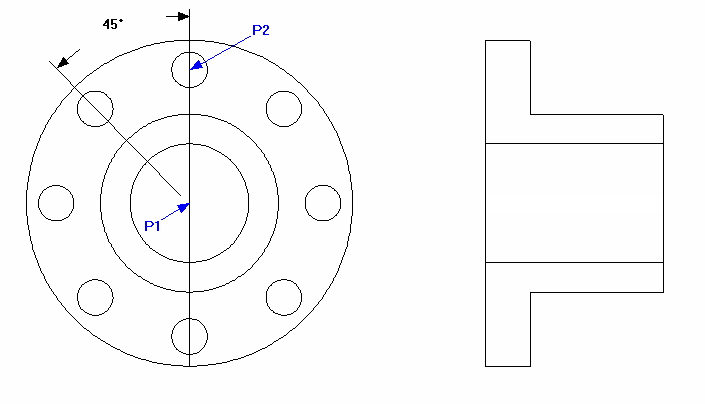
Select the 12mm diameter circle and then click on the Polar Array button
 .
.
You will find this button on the Modify Ribbon, you will see the 'Array' button with a small arrow pointing down next to it.
This indicates that there is more than one type of array button available. Click on the arrow and then pick the polar array button. The prompt reads:
Give Centre Point of Array:
Before indicating the centre point you will notice that the Ribbon has changed and now displays the specific options for this command. Change the 'No.' of value from the default value of '4' to '8' .
Now select the 'Mid' point of the vertical line or the 'Cen' point snap at the centre of the circles (P1). The prompt changes to:
Give Reference Point:
Select the 'Cen' point snap at the centre of the 12mm diameter circle (P2). The prompt changes to:
Give point to Array to:
Select the Polar input option
 and enter 45 into the angle input field.

This has locked the angle to 45° and as you move the cursor back into the drawing area you will see the arrayed circles positioned correctly. Click anywhere to accept the position and complete the array.