Draft it Help System
The complete Help system for Draft it is available on these pages.
Available in: FREE, Plus, Pro and Architectural
Select the 'Draw Text' button
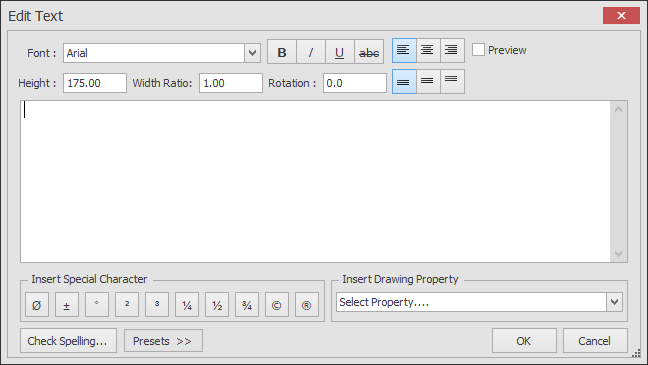
 and the following text entry window appears. Draft it draws the outline of the text string font. To view the 'filled' text use the
Print Preview function.

Simply type the required text into the window. Once your text string is complete click 'OK' to continue. (Clicking 'Cancel' will exit the text window and any text created or changes made will be lost.) The command prompt reads:
Give Text Point:
The new text string can now be placed on the drawing using any of the snaps and input options.
At this point the text is attached to the cursor and Ribbon contains the insertion options.

Font - The font face of the text, the list comprises fonts found on the computer by Draft it.
Bold - Use the button to switch the bold typeface modifier on/off.
Italic - Use the button to switch the italic typeface modifier on/off.
Height - The height of the text string in the current Units. There is an option to update this value should the drawing scale be change.
Width - This is a scale value for the width. The text width is adjusted by this factor .i.e 0.5 would compress the width by half, 2.0 would stretch the string to double width.
Rotation - The text can be rotated using this value. Measured anti-clockwise from the '3 O'clock' position.
Horizontal - This is the horizontal alignment for placement of the text string. Left, Centre or Right can be selected.
Vertical - This is the vertical alignment for placement of the text string. Bottom, Centre or Top can be selected.
The following feature are in available in:
Pro and Architectural

Special Characters
Clicking on any of the 'Special Character' buttons at the bottom of the window will add any of the none keyboard characters to your text string.
Insert Drawing Property
The 'Insert Drawing Property' list allows you to insert a tag into the text string which displays the value of the Drawing Property selected. For example if you selected the 'DESCRIPTION' tag the string <DESCRIPTION> would be placed into the text window at the text cursor position. When 'OK' is selected the text string can be placed onto the drawing and the 'DESCRIPTION' tag will be replaced by the value currently set in the Drawing Properties. If there is no value set the tag will be ignored. If the property is changed then any text string using the tag will be updated.
Spell Checker
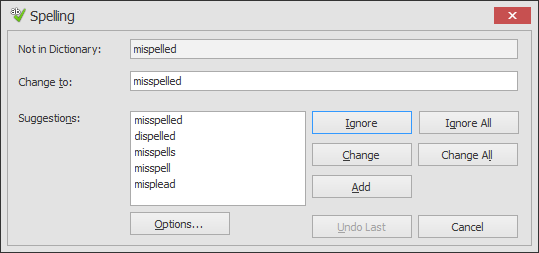
The inbuilt spell checker will highlight with a wavy red underline any incorrect spellings. Clicking on the 'Check Spelling...' button opens the following dialog box.

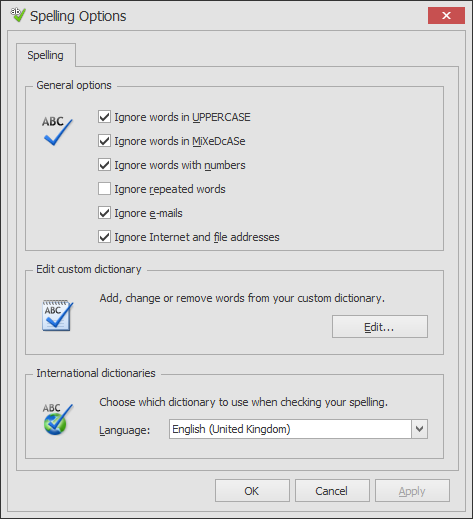
Incorrect spellings can be ignored, changed or added to the custom dictionary using the buttons to the right. Click the Options button to display the spelling options.

Here there are general options as well as functions to edit the content of your customer dictionary and change the language.
Presets
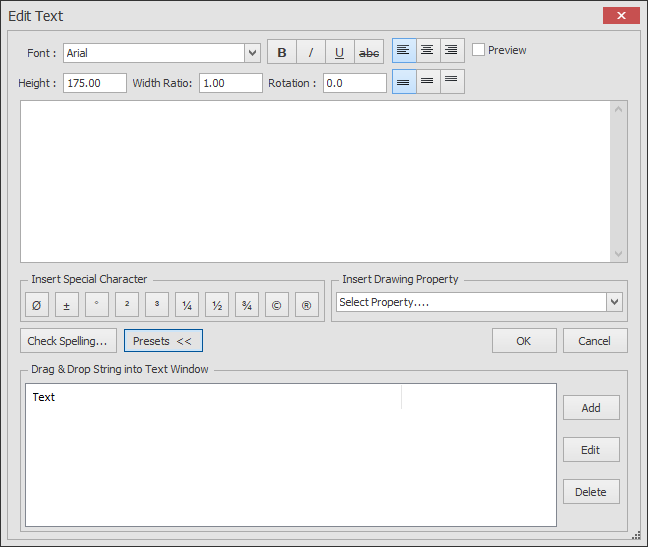
You can show/hide the 'presets' using the button here. When displayed the following area is shown below the text window where you can add/edit/delete the presets.

Simply drag and drop any preset into the text window to include in the text string.
