Draft it Help System
The complete Help system for Draft it is available on these pages.
Available in: Plus, Pro and Architectural
You can add hatching to Polylines
and/or Circles (boundaries).
Select the boundaries to hatch and the is activated. Click on the
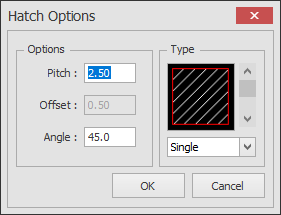
 button to display the Hatch options dialog box.


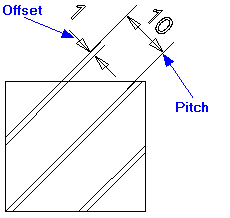
Pitch - This is the distance between the hatch lines.
Offset - If the hatch type is 'double' then each hatch line is offset by a parallel line at this distance.
Angle - this is the angle of the hatch lines.
There are three types of hatch pattern selectable by using the scroll-bar to the right of the picture or via the drop down list underneath it.
Single hatch is simply a series of parallel lines drawn at the specified angle spaced by the 'pitch' value.
Double hatch is the same as single except that each hatch line has a further hatch line drawn parallel to it at the 'offset' distance.
Cross hatch is the same as single except that a second set of hatch lines are drawn perpendicular the first set of lines creating a cross pattern.
Solid Fill - Fills the Area with a solid colour, it looks the same as the Area Fill command but supports holes and islands.
Once you are happy with the settings click 'OK'
The prompt reads:
Give Hatch Origin Point:
Indicate an origin point for the hatch using any of the snaps and input options and the hatch is added to the drawing. The hatch is not linked to the boundaries.
If multiple boundaries are selected they will be hatched separately. Any boundaries completely contained within another boundary will not be hatch, effectively being 'holes' or 'islands' within the outer boundary. For any boundaries which partially overlap then the intersecting part of the boundaries will not be hatched. The following diagram picture demonstrates this, showing the resulting hatch when both shapes are selected together.

For information on modifying a hatching see Modifying/Moving Hatching.
