Product Documentation
Draft it Help
Select the category below to quickly find the help you need.

Available in: Architectural
The symbols added to the first floor plan have been selected from the Draft it Architectural symbols libraries
Only symbols from the following categories have been used on this floor.


The picture below shows the furniture layout.
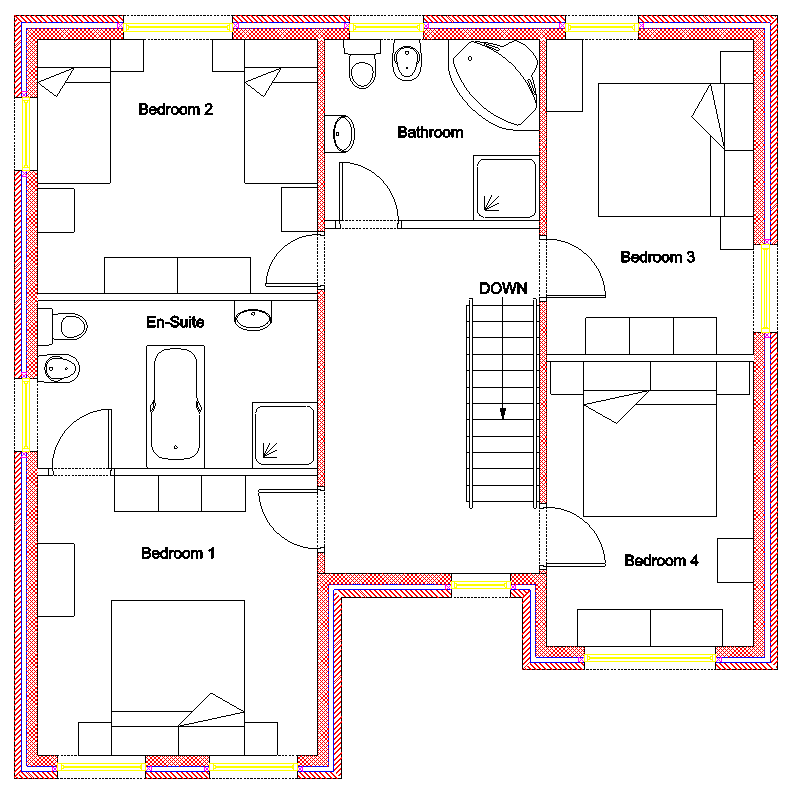
Room names have been added to the picture above to assist in placing the first floor furniture.
Lets start with 'Bedroom 1'. Click on the 'Furniture' button.
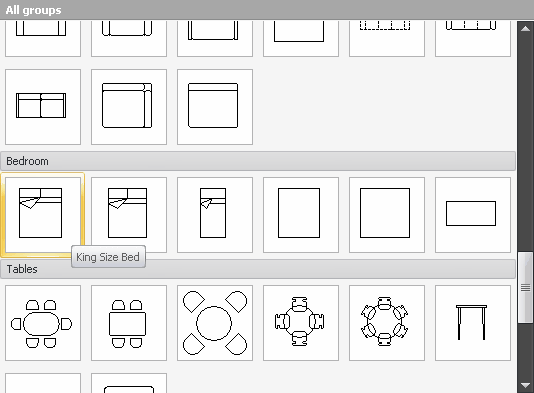
Click on the King Size Bed symbol and then click 'Insert'. The King Size Bed symbol is now attached to the cursor for placement. Move the cursor into the middle of the room and click
into place (see NOTE below). Hold down the
 key and swing the bed around 180 degrees and click into place.
From the 'Furniture' symbols dialog box insert a 'night table' on either side of the bed. A set of 'Drawers' has been placed along the left wall and three 'Wardrobes' along the back wall of the bedroom.
Continue to insert the various furniture items as shown in the first floor layout. All of the 'Bathroom' and 'En-suite' items used are found in the Sanitary library
NOTE
Sometimes depending upon the insertion point it is not possible to achieve the desired position first time. You may have to place the symbol approximately and use the
 Move command to position the symbol. On some occasions when multiple
insertions of the same symbol are required it maybe easier to place the first one and then use the
Move command to position the symbol. On some occasions when multiple
insertions of the same symbol are required it maybe easier to place the first one and then use the
 Copy command.
Any questions?
Perhaps you need help deciding which of our CAD systems is right for you, or maybe you need to chat with us about our bespoke development service.
Don’t hesitate to get in touch. The Draft it team is dedicated to ensuring you get the best design experience on the market. Whatever you need - call us, email us – we’re here to help.
 +44 1543 419 886
 enquiries@cadlogic.com
 Postal Address Details